Robotmk v2 quick start
Integrate the first RobotFramework test with Robotmk v2 in Checkmk step by step.

The step-by-step guide updated for Checkmk 2.4 for a successful start with synthetic monitoring using Robotmk!
In this tutorial, you will learn how to integrate a Robot Framework test into Checkmk using Robotmk.
Just a web test? No!
The test is intended to give you a little taste of what Robot Framework is all about: the sheer number of libraries for every conceivable use case.
The “web-images” test opens the page of a car insurance company and checks whether the home page contains an image of a motorbike. The following are used…
- Browser Library: some call it an alternative, I call it the worthy successor to the Selenium library. Under the hood, Playwright is at work, which, in terms of features, clearly outshines the much older Selenium.
- DoctestLibrary: a true all-purpose weapon for testing PDF documents and images or comparing them with reference data.
TL’DR – what is this actually about?
- Robot Framework is the most powerful and flexible testing tool you can find. It gives you the automation power of Python without having to write Python – because Robot Framework focuses strongly on readability and maintainability.
- Robotmk is the integration of Robot Framework into Checkmk. It bridges the gap between testing (run once and be satisfied) and monitoring (run continuously, record data and monitor). Robotmk consists of
- Bakery rule: for configuring the Robotmk scheduler
- Robotmk Scheduler: runs Robot Framework tests at regular intervals
- Robotmk Agent Plugin: reads the test results written by the scheduler and generates a Checkmk-compatible agent section from them.
- Robotmk Check: the Checkmk-side “counterpart”: it parses the results contained in the agent section and discovers a Checkmk service for each test.
Prepare yourself
- A Robotmk test client: here, the Robotmk scheduler will run the Robot Framework tests at regular intervals and report them to Checkmk via the Checkmk agent output.
- OS: Windows 11 or Server 2022/2025 or Ubuntu 22 or 24 (the limitation with Linux stems from the Playwright library; Additional apt packages required, see below)
- Internet access (to download the installation packages via
rcc) - min 8 GB RAM
- 4, preferably 8 CPUs (2 CPUs do not work – better not to try)
- Basic monitoring of the host set up by Checkmk
- Checkmk >= 2.3 (you can get it here for free if you don’t have more than 750 services – easily enough for testing)
(In this tutorial, we will use Windows as an example; the procedure is relatively similar on Linux. I recommend the seven-part series on the Checkmk YouTube channel: https://www.youtube.com/playlist?list=PL8DfRO2DvOK2XZVvaZwUztchXWoOYfnDM)
Let’s get started: Setting up the test client
Downloading RCC
The Checkmk agent, which we will install together with the scheduler in a moment, will include the
rcc.exebinary. You can skip this step if you no longer want to run the robot yourself and want to start directly with the scheduler.
For a preliminary test or to set up a development host, you will need to obtain the RCC binary yourself.
Download it here and save it to a location of your choice as rcc.exe. I have made it a habit to create a bin directory in the user profile: c:\Users\simonmeggle\bin\rcc.exe
Note: In Checkmk 2.5, we will provide an alternative method to RCC based on Micromamba, which comes with its own command line tool
csm(Checkmk Synthetic Monitoring). I will update this article soon.
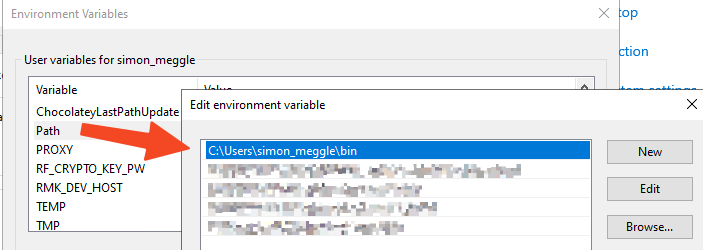
Now add this folder to the user environment variable %PATH%:
Open a new CMD and test whether you can now execute rcc from any location:

If you encounter any problems here, here are some possible sources of error that I have identified in my training courses so far: RCC Troubleshooting
Download the minimal test
Now it’s time to download the demo repo with the robot suite that we want to integrate into Checkmk.
I created the repository https://github.com/Checkmk/robotmk-examples specifically for sample suites. It is best to save it in your bookmarks.
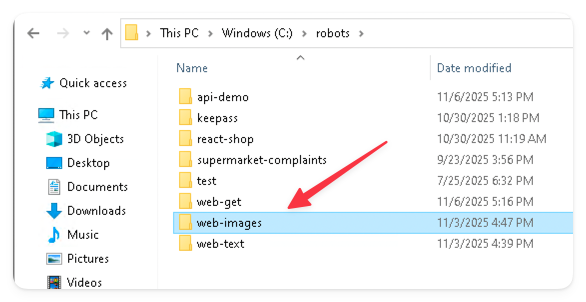
Unzip the file master.zip and save the subfolder examples/web/web-images in the folder C:\robots\. This folder serves as the base directory for all robot suites.
Testing the robot with RCC
At this point, it should be noted that we have not installed any software yet. Now it is time for RCC, which installs Python, NodeJs, etc. completely autonomously in an isolated environment in the background.
Open a CMD and navigate to the folder you just copied, C:\robots\web-images.
Now follow these commands, which you should execute in exactly this order. Read my explanation so that you understand how RCC works:
where python: Do we have Python available? The commandwhereis the equivalent of the Linux commandwhichand attempts to find the command passed as an argument (“Python”) via the%PATH%variable.
The%PATH variable%usually consists of a whole series of search paths separated by semicolons. Windows searches for the specified programme in exactly this order of paths. With this test, I want to find out whether Python is already installed on the system – and if so, where.
On a freshly installed system, there will probably be no output at all.rcc task shell: This creates the runtime environment for our test.
When you execute this command, you will see many lines that I do not need to explain here – the important thing to know is that the fileconda.yamlcontains all the packages that are now to be installed. RCC does this fully automatically.
When RCC is finished, you are in the environment. We say that the environment is now “activated”.where python: This time, the command returns the path to the Python interpreter in the newly created and now activated environment.where robot: Not only Python, but also Robot Framework is installed (isn’t that cool…? 😎).robot tests.robot: With therobotcommand, we can now start the Robot Framework test. Let yourself be surprised 😉
At this point, you will initially see error messages under Linux (Debian/Ubuntu). This is because certain packages need to be installed.
Now is the right time to do this because, in the activated environment, you can install the packages directly with the commandnpx playwright install-deps. Of course, this only works if you have root privileges.
Otherwise, you can runnpx playwright install-deps --dry-runand simply copy the command line for apt install. Then start a new shell with root and paste it there. Afterwards, restart the robot withrobot tests.robot.
This section has proven that the robot can be started via RCC. ✓
If this didn’t seem spectacular to you so far, then open the log file C:\robots\web-images\log.html.
The RobotFramework test didn’t just open a web page.
It also performed a visual comparison to see whether one of the images in the “Hero” section actually contained the motorbike.
In the next section, we will now turn our attention to integration with Checkmk.
Checkmk server
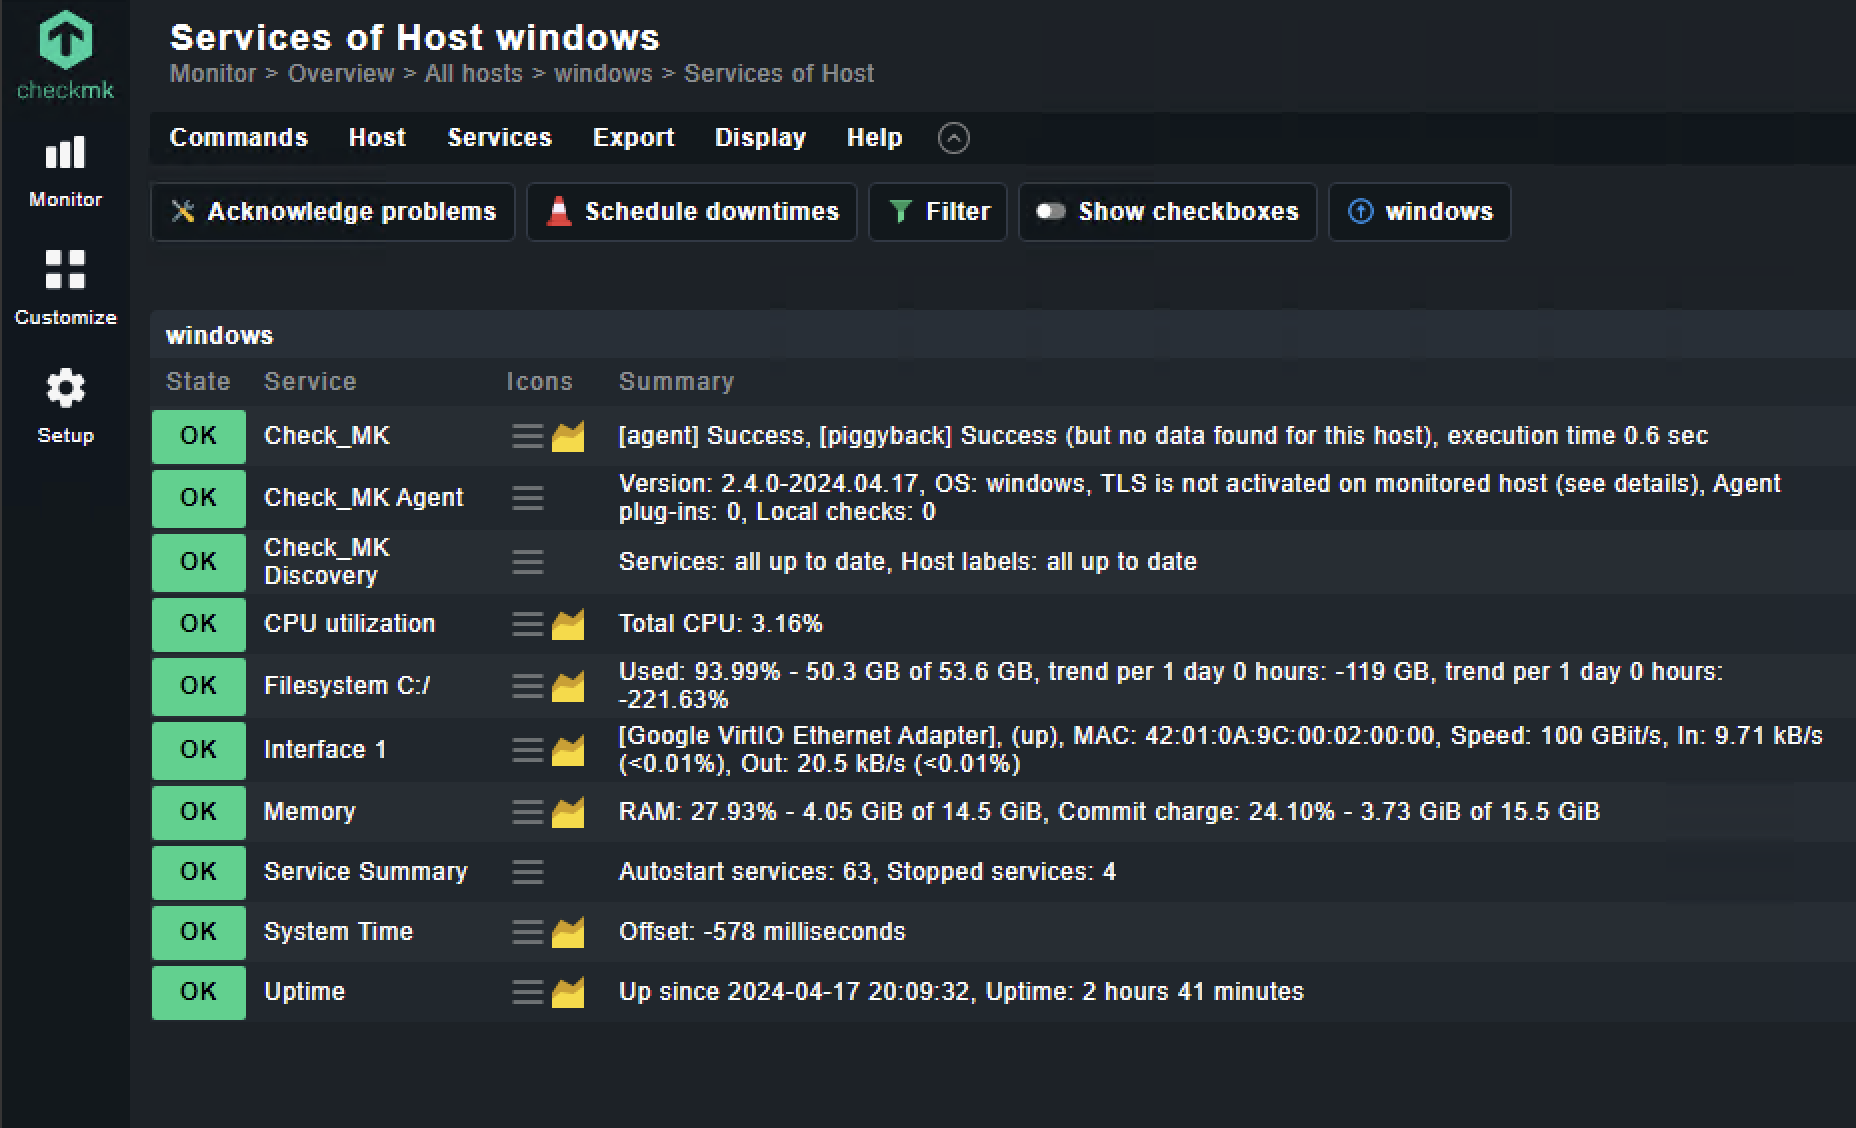
Not much has happened on the Checkmk server (v2.4) so far: the Windows host is currently only monitored with a vanilla CMK agent:
Configuring the Bakery
The Robotmk Scheduler can be installed on Windows and Linux. There is a separate Bakery rule for each, but both are completely identical in content.
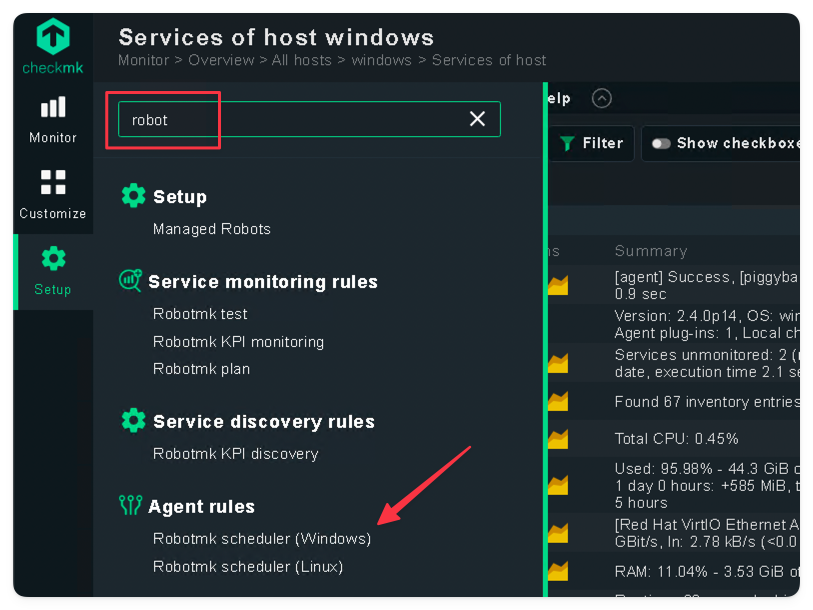
Pro tip: The easiest way to find all Robotmk rules is to enter the search string “robot” in the setup menu.
Now let’s open the rule page “Robotmk Scheduler (Windows)”:
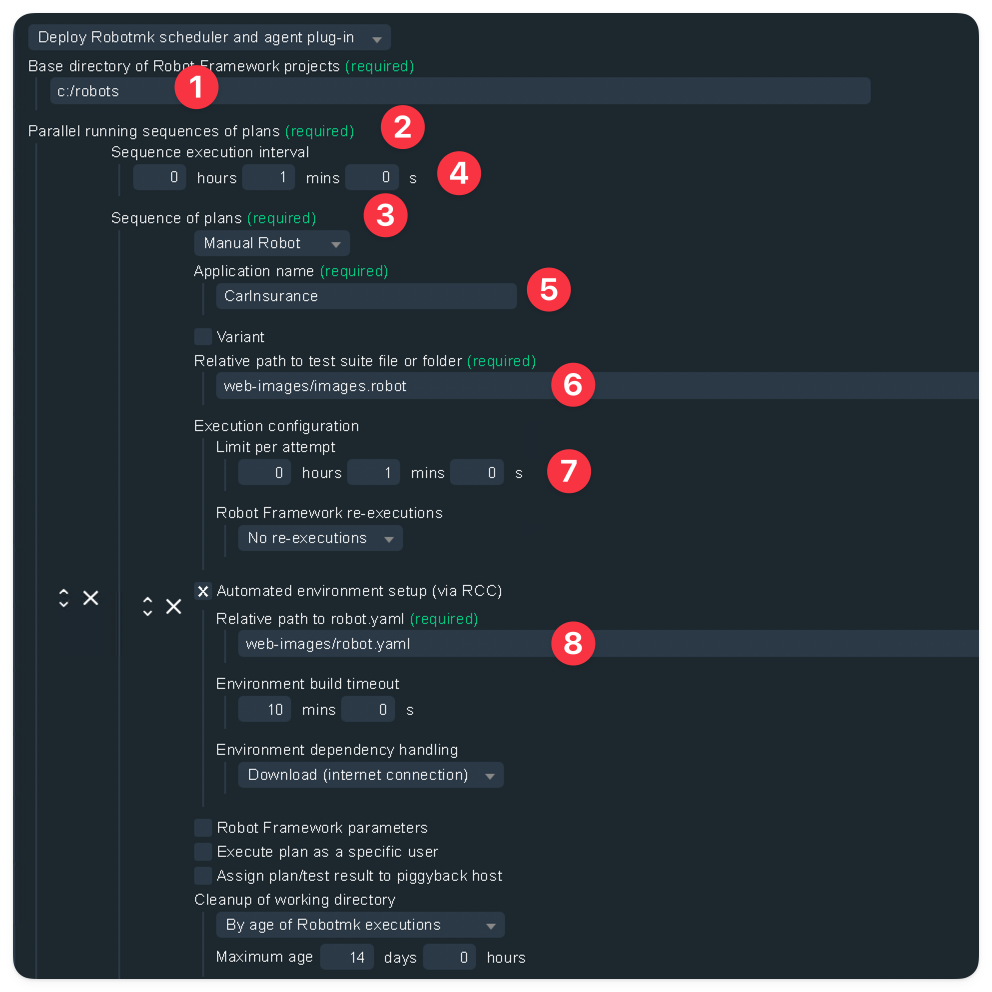
Below, I will explain the fields of the Bakery rule with the values to be entered:
| No | Description | Value |
|---|---|---|
| 1. | The base directory where we stored the sample suite. | C:\robots |
| 2. | The first (and only) parallel execution group. | |
| 3. | Sequential executions of Robot Framework suites are possible for each execution group. | |
| 4. | Execution interval of the group | 3 minutes |
| 5. | Name of the application to be tested | CarInsurance |
| 6. | The path to the Robot Framework suite is specified relative to the base directory. | web-images\images.robot |
| 7. | This timeout determines how much time the suite is given by the scheduler for execution. After that, it is terminated. | 1 |
| 8. | Relative path specification (as in 6.) to robot.yaml (central configuration file for RCC, contains reference to conda.yaml) | web-images\robot.yaml |
At the very bottom, the rule is restricted to the host windows:

Then save the rule.
Baking agents
Now switch to the Agent Bakery…
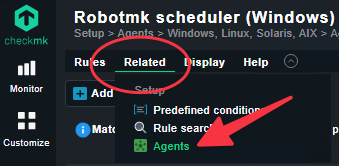
…and bake a new installation agent:
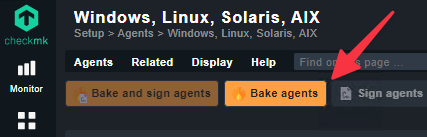
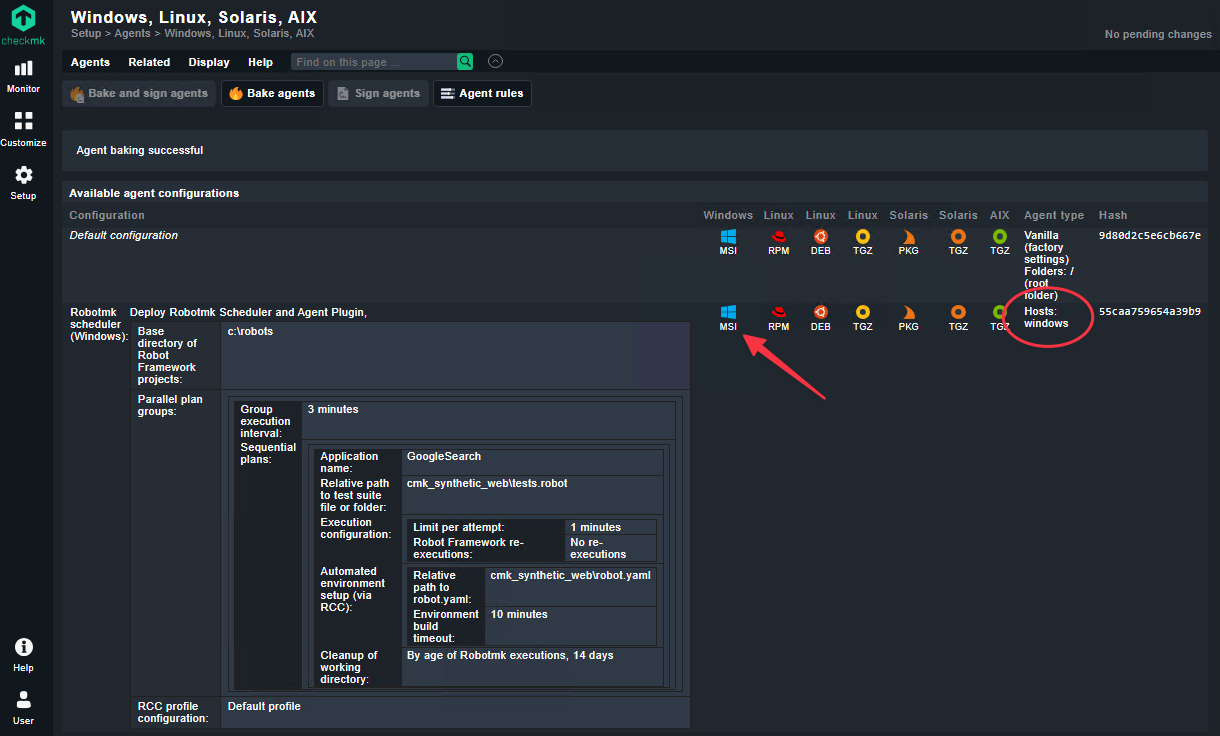
Once the agent installer has been created, you will see a new line with the host you restricted the rule to (windows) on the far right. Download the MSI package from here.
Discovery of services
The first service that can be discovered immediately after deployment is the “Scheduler Status” service:

It monitors the Robotmk Scheduler, which runs permanently alongside the agent as an “Extension” agent.
After the agent is started, the scheduler goes through two phases:
- Phase 1: Sequential building of all RCC environments
- Phase 2: Scheduling of plans (=configured Robot Framework suites) at the configured interval.
It may take a few minutes for the environment to be built in the background by the scheduler.
You can see when it is finished by the change in the output of the Scheduler Service:

After the first execution of the suite has taken place in the background (=“headless”), two further services can be discovered:
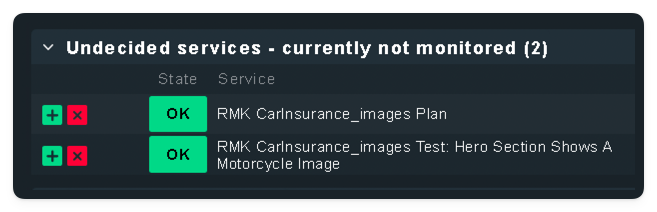
- Plan Service: Again, a service aimed at administrators, which, for example, strikes when results are too old (=the suite is no longer running).
- Test Service: Aimed at application managers. Represents the status (PASS/FAIL) of the test from the perspective of Robot Framework.
Checklist
This checklist summarises all the steps in brief:
- ✓ Download and unzip the sample repository
- ✓ Save the robot suite in the base directory
C:\robots\ - ✓ The Bakery rule in Checkmk requires at least the following settings:
- ✓ Base directory (e.g.
C:\robots\) - ✓ Execution interval of the group
- ✓ Base directory (e.g.
- ✓ Application name
- ✓ (Relative) path to the suite file/directory
- ✓ (Relative) path to
robot.yaml - ✓ Bake/deploy/install the agent
- ✓ Discovery
(If everything worked out, this would be a great time to give the project a star ⭐ on Github, right? 😄 )
Star
What’s next?
That was just the tip of the iceberg… we’ve only used two of over 200 RobotFramework libraries.
Robotmk opens up a whole new world for Checkmk administrators:
- Testing Windows desktop applications
- Testing RDP and Citrix sessions
- API testing (REST/SOAP)
- Kubernetes testing
- PDF comparisons
- MFA authentication with OTP
- etc.
I am passionate about this topic and have therefore developed a special training course for it – you can find the training content at https://checkmk.com/trainings/classes.
If you have any questions or problems, simply book a Clarity Call (just click on “Support” at the top).
Have fun and enjoy great implementation successes with Robotmk!