Robotmk Starter: Get Started Right Away with Synthetic Monitoring
No more flying blind: Ready-to-use, CI-tested Robot Framework suites as a starting point for successful synthetic monitoring in Checkmk.
Beginners in Robot Framework know the feeling: you sit in front of the first empty .robot file and wonder: How do I start? Which files do I need? How do robot.yaml, conda.yaml, and robot.toml work together?
At this point, it’s easy to lose track – the right starting point is missing, as well as a basic orientation.
For this purpose, I created the Robotmk Starter Repo: a curated set of ready-to-use, CI-tested examples and templates.
In this blog post, I will introduce the three most important examples, explain the underlying concepts, and show how to try them out immediately – either locally or directly in the browser with GitHub Codespaces.
Overview
The repo is user-facing in two areas:
examples/– complete, ready-to-run suites. Of course, these suites are not silver-bullet solutions, but they show finished approaches to mastering specific challenges – e.g., handling variable files or session management in the browser. (This is the best way to learn Robot Framework.)templates/– minimal starter skeletons for your own projects. The file structure is predefined, the test logic comes from you.
What is in the repo works - because all tests have been automatically tested beforehand.
Because there is nothing more frustrating than cloning an example that doesn’t work - whether due to outdated dependencies, missing files, or unclear instructions.
Earlier this year, there was an annoying bug in the Browser Library, which, due to a broken subdependency, destroyed already built environments on the next build.
You can also run all examples with a click in GitHub Codespaces – including browser tests with a visible desktop. No local installation required.
Note: all you need is a GitHub account and a browser - using Codespaces is free for up to 60 hours per month. I find that quite generous!
Example 1: cryptolibrary-simple – Passwords done right from the start
Anyone who checks suites into version control immediately faces a problem: where to put the passwords? Plaintext in the code is not an option. The solution is the robotframework-crypto library, which encrypts credentials. The repository only contains a crypt:… ciphertext, and the key password is provided at runtime as an environment variable. No plaintext is ever visible – neither in the code nor in the logs.
This example shows the finished solution. robotframework-crypto encrypts credentials, the repository only contains a crypt:… ciphertext, and the key password is provided at runtime as an environment variable. No plaintext is ever visible – neither in the code nor in the logs.
Info: conda.yaml defines the entire Python environment reproducibly. RCC builds it automatically on the first rcc run – identical on every host, without manual pip install steps.
This example is deliberately kept lean. The focus is not on the test, but on the pattern: Encrypt once, commit safely, decrypt at runtime. This pattern runs through all the following examples.
Example 2: web-cryptolibrary – The first small browser test
Here comes the browser into play. The test target is the login page on practicetestautomation.com.
Two test cases are deliberately placed side by side: the “wrong” way (plaintext password) and the correct way (encrypted with CryptoLibrary).
Info: The Browser Library is based on Playwright and includes Chromium, Firefox, and WebKit. RCC installs everything from the conda.yaml – including Node.js 22.11.0.
Example 3: rf-python-varfiles – Cleanly separating configuration
Every suite eventually needs configuration data: URLs for dev/test/prod, browser profiles, calculated values at runtime, etc…
Hardcoding this directly in the .robot file leads to problems when switching environments.
This example shows common patterns for reading variables from files – including the small pitfall often overlooked when reading from YAML files: the installation of pyyaml is required (see conda.yaml, where all packages are listed).
Info: Robotmk suites run on the monitoring host without knowing which environment they are targeting. Variable files are the clean way to separate configuration from test logic – without branching the code.
Example 4: rf-custom-library – Custom Keywords in Python
Once a suite contains domain-specific logic (calculations, API calls, database queries, proprietary systems), this logic does not belong in the .robot file.
The solution: a custom Python file as an RF library (aka “Library”).
This example shows the minimal framework - plus a subtle error when dealing with types:
from robot.api.deco import keyword

class CustomLibrary:

    @keyword("Say Hello")
    def say_hello(self, name):
        print(f"Hello, {name}!")

    @keyword("Add Numbers")
    def add_numbers(self, a, b):
        # RF übergibt alle Argumente als Strings – explizite Konvertierung ist Pflicht
        return int(a) + int(b)
Explanation: RF passes all keyword arguments as strings. a + b would concatenate two strings, not add numbers.
Importing the library in the suite is straightforward – a single path, no separate installation required:
Template: web-browserlibrary – Setting up browser tests correctly
If you are new to the Browser Library (Playwright), you might have questions like
- How do I structure resource files?
- Where should the browser start?
- How do I switch between headless and headed mode?
- How do I ensure a screenshot is taken automatically on errors?
This template answers these questions through a ready-to-use, copyable structure.
Disclaimer: there are always many ways to achieve the same goal. This boilerplate code reflects how I personally structure browser tests. It is not a dogma, but a suggestion that you can adapt to your needs.
Three Ways to Try It Out
How can you use these examples for yourself? There are three options, depending on what you want to do and prefer:
Way 1: GitHub Codespaces (recommended)
Each example has its own devcontainer configuration and is automatically mirrored into a dedicated repo.
Clicking on “Open in GitHub Codespaces” starts a complete development environment in the browser:
- RCC is preinstalled
- VS Code - fully in the browser
- The Python environment is automatically built
- FFor web tests, the Devcontainer starts a noVNC desktop at
http://localhost:6080- a detailed guide is included in the README.
Way 2: VS Code locally
git clone https://github.com/elabit/robotmk-starter
cd robotmk-starter/examples/web-webshop
rcc task shell   # builds the isolated environment and opens a shell
code .           # opens VS Code from the activated environment
For the best workflow, it is recommended to use the RobotCode extension – it provides syntax highlighting, autocomplete, and integrated run/debug buttons for Robot Framework.
Way 3: Directly on the console
cd examples/cryptolibrary-simple
rcc task shell
robot suite.robot
RCC builds the environment automatically on the first run and executes the suite.
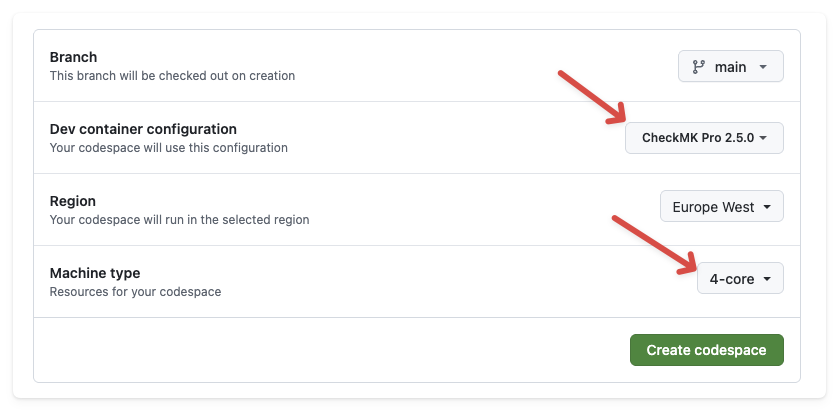
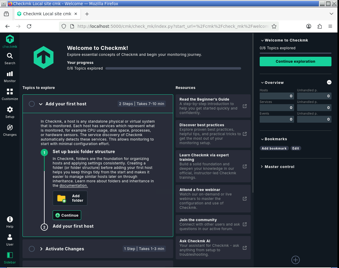
Bonus: Complete Checkmk Instance in the Browser
The repo also includes a .devcontainer/ setup that launches a full Checkmk Pro 2.5 instance – including Fluxbox/noVNC desktop:
This allows you to experience the entire setup – Checkmk, Robotmk Scheduler, and the example suites – without a single local installation.
Conclusion
With the Robotmk-Starter repository, you get examples that are guaranteed to work, structures you can adopt - with the assurance that the examples won’t become outdated.
The rest is up to you :-) - get started:
→ https://github.com/elabit/robotmk-starter
Which example do you think is missing? What would you like to see next? Feel free to write it in the comments!